


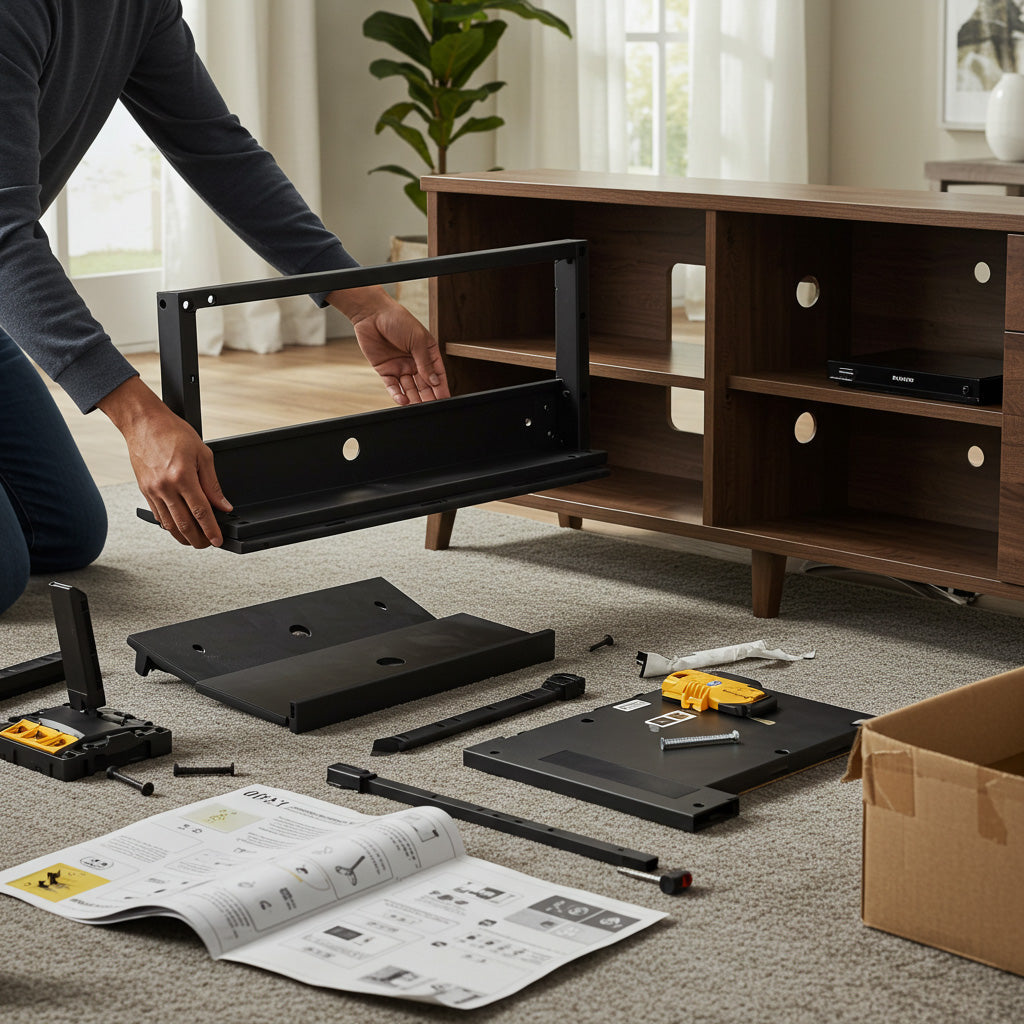
Assembling a TV stand from a flat-pack box might make you want to pull your hair out. Many of us have sat on the floor, surrounded by parts, wondering if we're looking at the manual upside down. Those tiny diagrams and vague instructions rarely tell the whole story.
That's why we created this guide. We'll walk you through each assembly step with clear, real-world tips that most manuals leave out.
With proper planning and our straightforward instructions, you'll have your TV stand ready in no time. You might even enjoy the process of bringing your new furniture to life.
Step 1: Gathering the Required Tools
Before you open the box of your new TV stand, take a moment to gather all the necessary tools. Having everything organized and within reach will help you avoid frustrating interruptions during assembly. Your first step should be to check the instruction manual that came with your TV stand, as it lists the specific tools needed for your model.
Common Tools You'll Need
- Phillips-head and flat-head screwdrivers (multiple sizes): Choose screwdrivers that fit snugly into screw heads to prevent slipping and stripping
- Allen wrench (hex key): Usually included in the package, but check the manual for specific size requirements if missing
- Hammer: Use for tapping in nails or dowels, but always protect surfaces with a cloth to prevent damage
Helpful Additional Tools
- Power drill: Speeds up assembly for multiple screws, but always use the lowest torque setting to protect the material
- Adjustable wrench: Helpful for tightening bolts and nuts securely without damaging the threading
- Wood glue: Adds extra stability to joints, but only apply a thin layer when the manufacturer allows
- Level: Ensures your TV stand and shelves are perfectly straight for safe TV placement
- Measuring tape: Helps you verify dimensions and plan your workspace before starting assembly
- Soft cloth: Keeps your work surface protected and helps wipe away dust or debris during assembly
Step 2: Checking the Components
Taking time to check all parts before assembly helps you avoid frustrating delays later.
Start by laying out all components on a soft surface like a carpet or blanket. This protects the parts from scratches and makes them easy to see.
Here's what to check:
- Match every piece against the inventory list in your manual
- Look for any damage, like scratches or dents, on all parts
- Count and group similar hardware items (screws, bolts, cam locks)
- Check that mounting brackets and support pieces are intact
If you find missing or damaged parts, contact the manufacturer right away. Don't try to build the stand with broken or missing pieces - this could make your TV stand unstable and unsafe.
Keep the original packaging until you're fully satisfied with the assembled stand. You'll need it if you have to return or exchange any parts.
Step 3: Understanding the Instructions
Before assembling your TV stand, you need to properly understand the instruction manual. While some manuals are clear and detailed, others might be confusing. Taking time to review everything carefully will help prevent mistakes.
Here are the key steps to follow:
- Read through the entire manual first to understand its layout and overall assembly flow.
- Check that all parts match the list provided in the manual.
- Study the main diagrams to understand how panels fit together and which way they face.
- Learn how the hardware works, especially items like cam locks and dowels.
- Review the assembly sequence - this order matters for proper construction.
If you find the instructions unclear, look for assembly videos of your model online. Many manufacturers also offer customer support for assembly questions, so don't hesitate to reach out if you're stuck.
Pay special attention to any safety warnings or weight limits mentioned in the manual. These details are critical for the proper use of your TV stand. Taking extra time to understand the instructions now will save you from having to backtrack or start over later.

Step 4: Preparing the Workspace
A well-organized workspace is essential for building your TV stand safely and efficiently. You'll need a spacious area where you can spread out all components and move around freely.
Here's how to prepare your workspace:
- Clear a large, flat area where you can walk around the TV stand easily.
- Protect your floor by laying down a blanket, carpet, or the unit's cardboard packaging.
- Ensure proper lighting, either natural or artificial, to see small parts clearly
- Place the instruction manual and tools within easy reach.
Keep your workspace tidy by disposing of packaging as you go. A well-ventilated area makes for a more pleasant building experience.
For safety reasons, keep children and pets away from your work area. Small parts can be dangerous for little ones, and distractions could lead to assembly mistakes.
Step 5: Assembling the Base
The base is your TV stand's foundation, providing crucial stability for your entertainment setup. Follow these steps carefully for a secure assembly.
- Identify Base Components: Lay out all base parts on a clean, flat surface. This includes the main base plate, legs or feet, support brackets if included, and all necessary screws and fasteners. Sort hardware by size for easier assembly.
- Attach the Legs: Line up each leg with the corresponding pre-drilled holes on the main base plate. Insert the provided screws through the mounting holes and hand-tighten first, then use a screwdriver to secure them firmly until each leg sits flush.
- Secure Support Brackets: Check your manual for proper bracket placement between the base and legs. Install each support bracket using the recommended hardware, ensuring they're positioned at the correct angles for maximum stability.
- Check Overall Stability: Place the assembled base on a level floor near its final position. Test stability by gently pressing each corner and side. If you notice any wobbling, recheck and tighten all connections until the base feels completely secure.
- Verify Alignment: Confirm all mounting points and pre-drilled holes align properly for attaching the next components. This step is crucial as it ensures the remaining parts will fit correctly during final assembly.
- Clean and Prepare: Wipe down all surfaces with a soft cloth to remove dust, fingerprints, or debris. This final check ensures clean mounting surfaces and maintains the stand's appearance for the next assembly phase.
Always refer to your specific model's instruction manual, as assembly steps may vary between different TV stands.
Step 6: Attaching the Support Columns
Support columns are the backbone of your TV stand, providing height and structural stability.
Follow these steps to attach the columns:
- Check the orientation markers on each column. Look for pre-drilled holes, grooves, and finished edges to ensure correct positioning. The most common mistake is the wrong orientation, which can force you to restart the entire assembly.
- Line up the columns with the matching holes on the base. Each column should fit snugly in its designated spot. A proper alignment at this stage prevents wobbling issues later.
- Secure each column with the provided screws, but don't overtighten them. Over-tightening can strip the screw holes or crack the material, weakening the structure.
- If your stand has height adjustment features, install any extension columns according to the manual. These pieces often have specific locking mechanisms for safety.
- Test the stability by gently wiggling each column to ensure they're firmly attached. Any movement now could indicate problems that will worsen with use.
- Verify all holes align properly with the base brackets for structural integrity. Misaligned holes suggest an installation error that needs correction.
- Wipe down the columns with a dry cloth to remove any dust or fingerprints. Clean surfaces help you spot any damage or defects that need attention.

Step 7: Installing the Shelf or Mounting Bracket
This step adds space for your TV and equipment or sets up the mounting system for your TV.
- Find all components: Lay out all shelf pieces or mounting bracket parts that match your manual's list. Count each piece and group similar items together. This prevents confusion and helps you spot any missing parts before you start.
- Plan your placement: Take a moment to decide where your shelves or bracket should go. Consider your viewing height when seated, where your electronics will sit, and how cables will run. Measure twice to avoid redoing the work.
- Align properly: Position your shelf or bracket against the support columns. Make sure all pre-drilled holes line up perfectly. If holes aren't lining up, don't force it - you might have the piece backwards or upside down.
- Secure the parts: Insert each screw or fastener into its designated spot. Start at the corners and work your way to the middle. Turn each screw just until you feel resistance, don't over-tighten as this can damage the material.
- Level check: For shelves, verify that support pegs or brackets are perfectly level. Uneven supports can cause the shelf to tilt, creating safety risks. Check both sides with a level tool to be certain.
- Stability test: Give your installation a careful shake test. The shelf or bracket should feel solid with no movement. If you notice any wobble, check which screws need tightening and adjust them right away.
Once installed, carefully distribute heavy items and check that you're within the weight limits.
Step 8: Organizing the Cables
Good cable management makes your TV stand safer and more attractive. Here's how to organize your cables properly:
- Prepare Your Cables: Gather every cable you'll need - power cords, HDMI cables, and audio connections. Sort them by type and make sure each one works before installation.
- Inspect Cable Management Features: Take a close look at your TV stand's built-in features. Modern stands often include cable routing holes, hidden channels behind panels, or built-in plastic clips.
- Plan Your Cable Routing: If your stand has a removable back panel with pins, carefully plan your cable paths. Thread all cables through the panel before securing it fully.
- Bundle and Organize: Group cables that follow the same path using cable ties or Velcro straps.
- Label Everything: Use a label maker or write clearly on masking tape to mark both ends of each cable. Include what the cable connects to and its purpose.
- Conceal the Cables: Route all bundles behind the TV stand using the built-in channels. For exposed areas, use adhesive clips that match your stand's color.
- Check and Adjust: Test each connection and adjust cable lengths. Cables should have just enough slack to prevent strain but not so much that they sag or loop visibly.
For a professional finish, you might want to add cable raceways or cord covers for any remaining visible wires.
Related Reading: How to Hide Cords Behind a TV Stand?
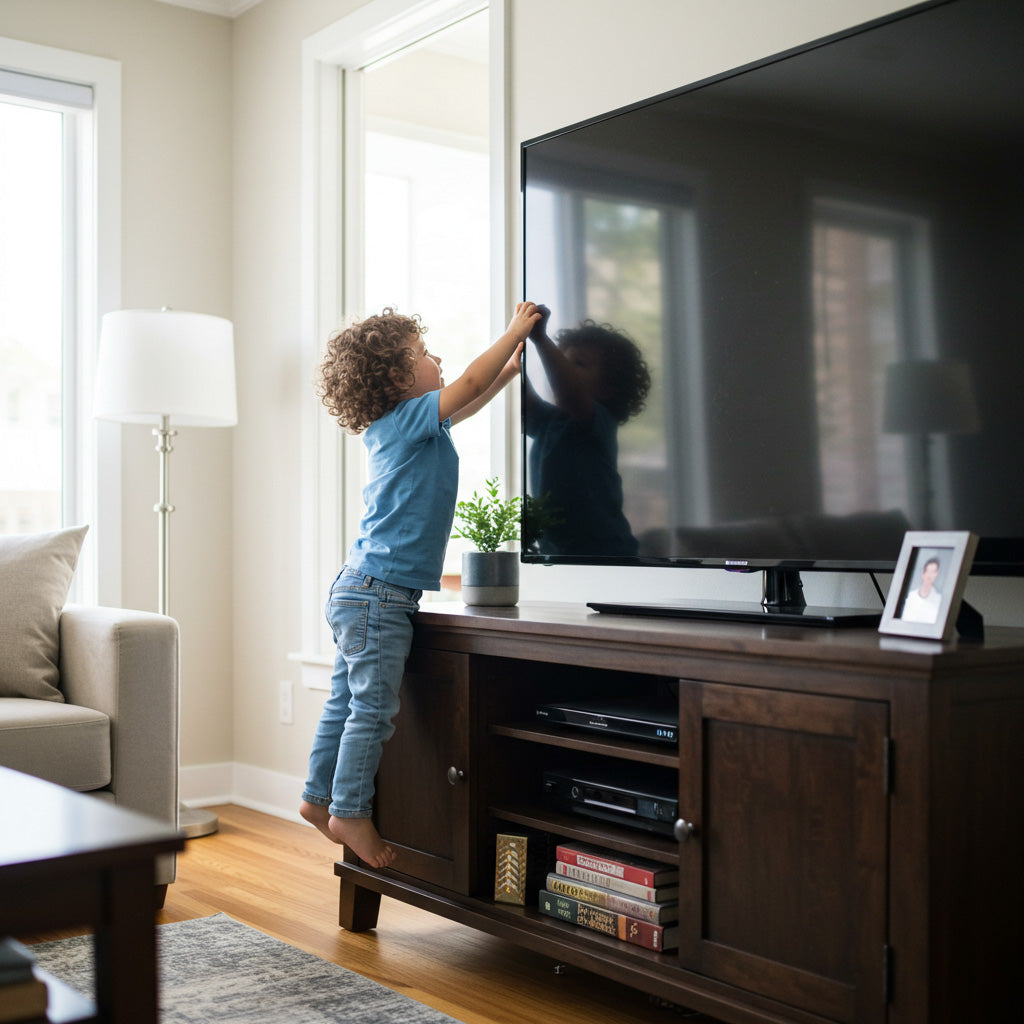
Step 9: Securing the TV on the Stand
Follow these steps carefully to ensure your TV is stable, safe, and secure on its stand, preventing accidental tips.
- Inspect Your Setup: Check that your TV stand sits on a level surface and can support your TV's weight and size. Review both your TV and stand manuals for specific mounting requirements.
- Choose Your Mounting Method: Decide between using the TV's base directly on the stand or installing a VESA mount. For bracket mounting, gather all parts and verify they match your TV's specifications.
- Prepare the Mounting Components: Gather all mounting hardware and brackets provided. Assemble the brackets following the manual's instructions. Verify all holes align correctly and you have the right size screws for your TV model.
- Position and Attach the TV: With a helper, lift the TV carefully. For direct mounting, center it on the stand base. For bracket mounting, align the TV holes with the bracket positions. Insert and tighten all screws to the specified torque level in your manual.
- Verify the Stability: Push the TV gently from all sides to test for wobbling. If you notice movement, recheck all connections and mounting points. Adjust the TV's position or retighten screws as needed until completely stable.
- Organize Your Cables: Use the stand's built-in cable management features to route power and device cables. Keep cords neat and organized to prevent tripping hazards and maintain a clean appearance.
- Secure Against Tipping: Install the anti-tip strap between your TV and the wall according to the provided instructions. This essential safety device prevents the TV from falling forward and protects your family from accidents.
Related Reading: How to Secure Your TV to a Stand?

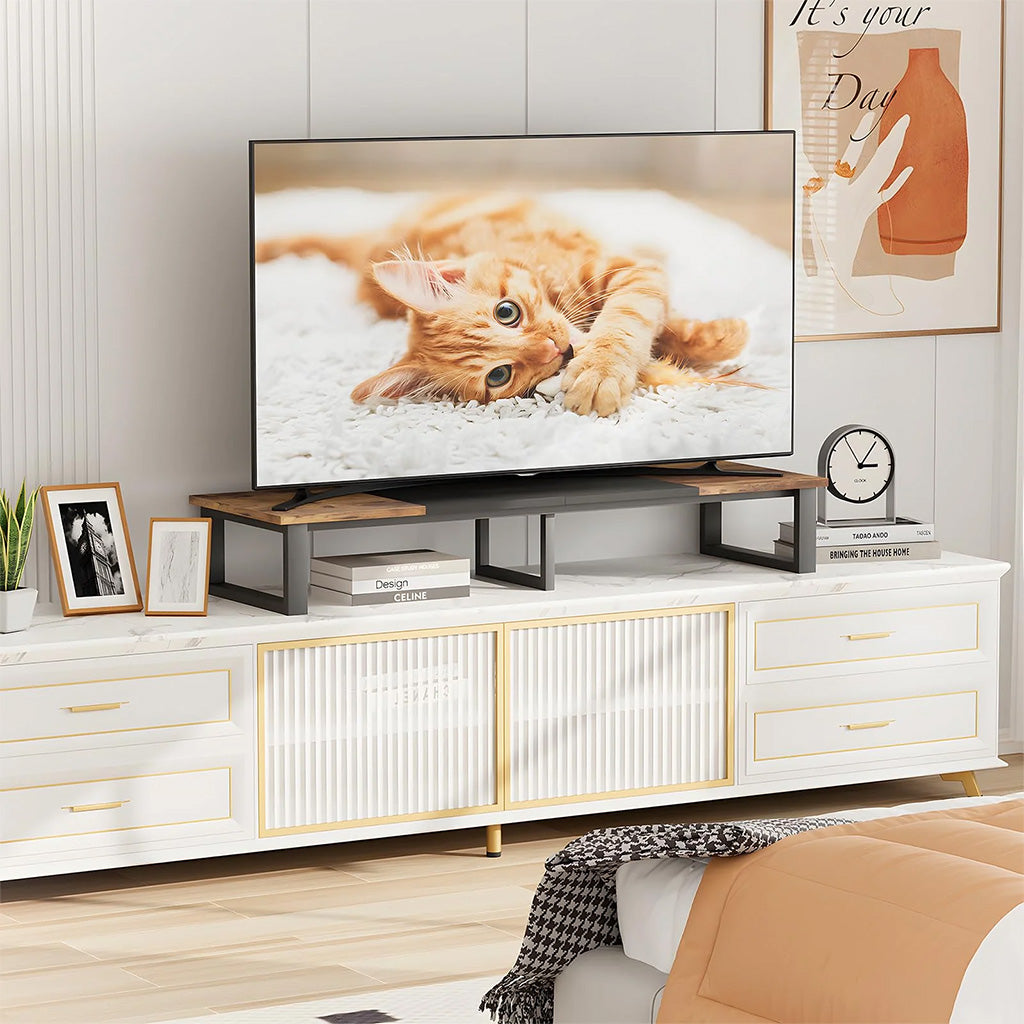
Step 10: Final Touches and Testing
Your TV stand assembly is almost complete. Take a moment to inspect the overall alignment and tighten any loose components. A soft cloth will help you remove dust and fingerprints from the entire stand.
Here's what you need to do next:
- Test the stand's stability with gentle pushes from different angles
- Check that all mounting brackets and screws are secure
- Connect your devices with properly organized cables
- Place your gaming consoles and media players neatly on the shelves
- Test any moving parts like swivel mechanisms or adjustable shelves
The final step is calibrating your TV display and audio settings to match your viewing space. Good calibration creates the best viewing experience.
Keep an eye on your setup during the first few days of use. Look for any signs of instability or loose components. Regular checks of the hardware every three months will prevent potential problems and keep your TV stand secure.
Conclusion
Assembling your TV stand might seem tricky at first, but with careful preparation and by following these steps, you'll create a sturdy centerpiece for your living room. Remember to check your specific model's manual for detailed guidelines and safety instructions.
We hope this guide gives you the know-how to tackle your TV stand assembly with confidence. Take your time, follow each step, and enjoy your newly assembled entertainment space.
Leave a comment
This site is protected by hCaptcha and the hCaptcha Privacy Policy and Terms of Service apply.