


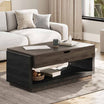


Floating TV stands transform your living room by clearing clutter and creating more space. Unlike traditional TV stands, they mount directly to the wall and seem to float in midair.
The result looks amazing, but getting there takes careful planning. One wrong move can mean a crooked stand or damaged walls.
This guide takes you through the entire mounting process, from choosing the right wall studs to drilling pilot holes to final safety checks. You'll get professional results without the professional price tag.
Step 1: Gather the Necessary Tools and Materials
Before you start mounting your floating TV stand, gather everything you need. Having the right tools ready saves time and prevents frustration. Here's what you'll need:
- Stud finder: This device locates the studs behind your drywall. You need to attach your TV stand to studs for proper support.
- Measuring tape: You need accurate measurements to ensure proper alignment and positioning of the TV stand.
- Level: Ensures your TV stand sits perfectly straight. Even small tilts will be noticeable.
- Power drill: Makes pilot holes and drives screws into the wall. Get one with variable speeds for better control.
- Screws and anchors: These securely fasten the mounting hardware to the wall.
- Wrench or screwdriver: Depending on your TV stand type, you may need these to tighten bolts and screws.
- Assistant: Having an extra pair of hands helps immensely during installation. They can hold the stand while you mount it.
- Drop cloth: Place this on the floor to protect it from dust and debris while drilling.
Double-check your TV stand's instruction manual. Some models require specific drill bit sizes or special mounting hardware. Once you have everything ready, you can move on to finding the perfect spot for your TV stand.

Step 2: Determine the Placement of the TV stand
Before mounting your floating TV stand, you need to decide on the ideal placement. Taking time to plan now prevents problems later. Consider these factors:
- Assess wall space: Look at the size and weight of your TV and stand together. Make sure your chosen wall can support the total loaded unit.
- Viewing angle: Position the stand so you can watch comfortably without straining your neck. The TV center should be at eye level when you're seated.
- Cable management: Plan where your cables will run. Check the location of power outlets and decide if you need in-wall cable solutions or surface-mounted raceways.
- Room layout: Think about how the TV stand fits with your other furniture. Consider traffic flow and make sure it complements your room's overall look.
Once you've determined the ideal placement for your TV stand, you can move on to the next step. Now it's time to start locating and marking the mounting positions on the wall.
Step 3: Locate and Mark the Mounting Positions
You've picked the perfect spot on your wall. Now you need to figure out exactly where to attach your floating TV stand. Getting these measurements right is key to a secure mount. Here's what you need to do:
- Use a stud finder: Start by using your stud finder to locate the vertical studs within the designated wall area. Mark the positions of these studs with a pencil, as they will provide essential support for your floating TV stand.
- Measure and mark: Take the width and height measurements of your floating TV stand. Then, mark these dimensions on the wall to indicate where the top corners of your TV stand will be positioned.
- Double-check: Before proceeding, use a level to confirm that the markings you made for the top corners of the TV stand are perfectly aligned horizontally. This step is crucial for a straight installation.
- Mark the mounting holes: Take the mounting brackets or hardware included with your TV stand and align them vertically on the wall with your marked top corner positions. Carefully mark the precise locations for each of the mounting holes on the wall through the brackets.
Take your time with these markings. Rushing this step often leads to problems you'll have to fix later. Once you have all your drill points marked clearly, you're ready to start installing the actual mounting hardware.

Step 4: Install the Mounting Hardware
Now that you've marked the mounting positions on the wall, you're ready to install the hardware. Follow these steps carefully to ensure your floating TV stand is secure.
- Pre-drill Pilot Holes: Use a drill bit that's slightly smaller than your screws or anchors. Drill into each marked spot on the wall. These pilot holes make it easier to insert your hardware without damaging the wall.
- Insert Anchors or Screws: Your wall type determines which hardware to use. For drywall, use wall anchors. For studs, use wood screws directly. For concrete, use masonry anchors. Push the anchors or screws into the pilot holes. Make sure they sit flush with the wall surface.
- Attach Mounting Brackets: Line up the brackets with your installed hardware. Secure them using the screws or bolts from your kit. Check the manufacturer's instructions for any specific steps.
- Double-Check Bracket Alignment: Use a level to verify the brackets are straight. Check both horizontally and vertically. This step ensures your TV stand won't be crooked.
You've now created a solid foundation for your floating TV stand. The hardware is secure and properly aligned. Your next step is attaching the brackets to the TV stand itself.
Step 5: Attach the Brackets to the TV Stand
With the wall hardware in place, it's time to attach the brackets to your TV stand. This step creates the connection between your stand and the wall.
- Position your TV stand: Move your TV stand to where you want it. Line up the bracket attachment points on the stand with the hardware on your wall.
- Secure the brackets: Attach the brackets to the TV stand using the provided screws or bolts. Tighten each screw evenly to ensure the brackets sit flush against the stand.
- Check your alignment: Use your level to verify the brackets are straight on the TV stand. Look for any tilting left or right. Make small adjustments if needed until it's perfectly horizontal.
You've now created a strong connection between the TV stand and the wall brackets. The stand is ready to be mounted on the wall. This secure attachment ensures your TV stand will be stable and safe. Your next step is lifting and mounting the stand onto the wall brackets.

Step 6: Mount the TV Stand on the Wall
With brackets attached to your TV stand, you're ready to hang it on the wall. Follow these steps carefully to ensure a safe and secure installation.
- Get help from someone: Ask a friend or family member to help you lift and position the stand. They can support one side while you handle the other, making the job much easier.
- Lift and align the TV stand: Work together with your helper to carefully lift the stand to the wall. Guide it toward the wall brackets, taking care to line up the stand's brackets with the wall hardware.
- Secure the TV stand: Once you have the stand properly aligned, attach it to the wall hardware using the provided screws or bolts. Tighten all connections firmly, making sure each screw is fully secured.
- Final alignment check: Use your level one more time to verify the stand is perfectly horizontal. Look at it from different angles to spot any tilting that might not be obvious. Make small adjustments as needed until everything sits perfectly level.
You've successfully mounted your TV stand to the wall, and the hardest part is complete. Your stand is now secure and ready for the finishing touches before use.
Step 7: Secure the TV Stand in Place
Now that your TV stand is mounted on the wall, you need to make sure it's completely secure. Taking time for this step ensures your stand will be stable and safe for everyday use.
- Tighten all screws and bolts: Go over every connection point with your screwdriver or wrench. Make sure all the screws connecting the TV stand to the wall brackets are fully tightened.
- Test stability: Apply gentle pressure to your TV stand from different angles and give it a light shake. If you notice any wobbling or looseness, stop and retighten the connections until the stand feels rock-solid.
- Check the weight limit: Look up the weight capacity in your TV stand's manual or on its packaging. Compare this number to your TV's actual weight to ensure you're within the safe limit.
Your TV stand is now properly secured and ready for use. You've created a stable, reliable platform that will safely support your television for years to come.
Step 8: Confirm Stability and Adjust If Necessary
After securing your TV stand, you need to perform a final stability check and make any needed adjustments. These last steps ensure your stand will stay secure and level for years to come.
- Double-check alignment: Use your level again to verify the TV stand is perfectly horizontal. If you notice any tilting, loosen the mounting screws slightly and adjust the stand's position. Once it's level, retighten all the screws to lock it in place.
- Test the stability: Apply gentle pressure to different parts of the TV stand and try to rock it slightly. A properly mounted stand should feel completely solid without any movement or wobbling. If you detect any instability, go back through the installation steps and tighten all connections.
- Organize your cables: Now is the perfect time to arrange all the cables from your TV and other devices. Use cable clips, ties, or cable channels to keep wires neat and hidden from view.
- Regular checks: Check the TV stand's mounting every few months. Over time, screws can loosen from the weight and daily vibrations. When you spot any looseness, simply retighten the hardware to maintain stability.
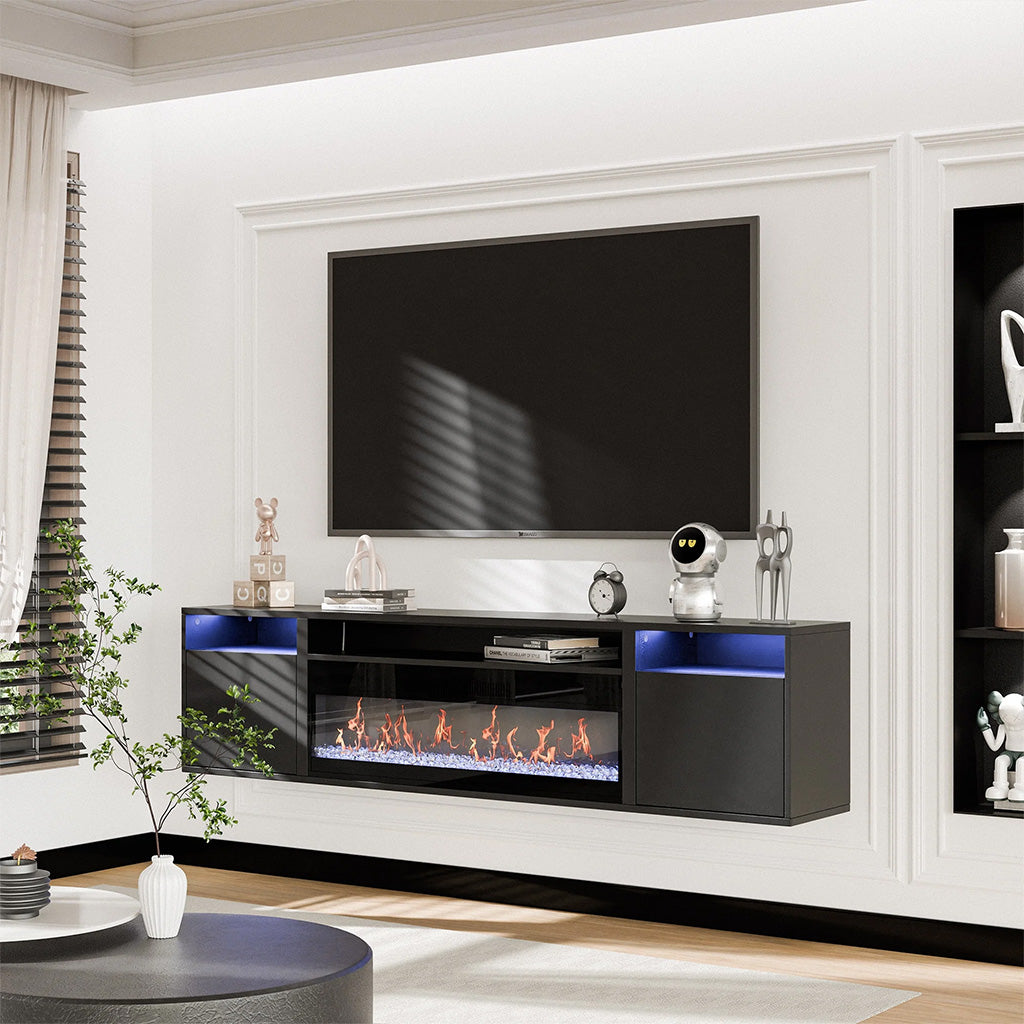
Your floating TV stand installation is now complete, giving your room a modern look with improved functionality and space.

Conclusion
Installing a floating TV stand transforms your living space with both style and function. Each step, from gathering tools to checking stability, ensures a secure and attractive result. If you're unsure about any part, consider hiring a professional for safety.
A well-mounted floating TV stand saves floor space and creates a modern, clean look. With careful planning and attention to detail, you'll have an organized entertainment area that everyone can enjoy.
You now have the knowledge to tackle this project. Take your time, follow the steps, and create the stylish, comfortable room you've been wanting.
FAQs
Can I mount a floating TV stand on any type of wall?
You can mount a floating TV stand on most walls, but different walls need different hardware. Drywall requires wall anchors or studs for support. Concrete and brick walls need masonry anchors. Plaster walls may need special toggle bolts. Always check your wall type first and use the right hardware for safety.
Is it necessary to hire a professional to mount a floating TV stand?
You don't need to hire a professional if you're comfortable using basic tools and following instructions. However, consider hiring help if you're mounting on tricky walls like brick or if your TV stand is very heavy. Professionals ensure proper installation and can save you from costly mistakes or wall damage.
Can I mount a floating TV stand without damaging the wall?
Mounting a floating TV stand requires drilling holes, so some wall damage is unavoidable. However, you can minimize it by measuring carefully and drilling only where needed. Use the right drill bit size for your hardware. When you remove the stand later, you can fill the holes with spackling paste and paint over them.
Related Reading:


Leave a comment
This site is protected by hCaptcha and the hCaptcha Privacy Policy and Terms of Service apply.