


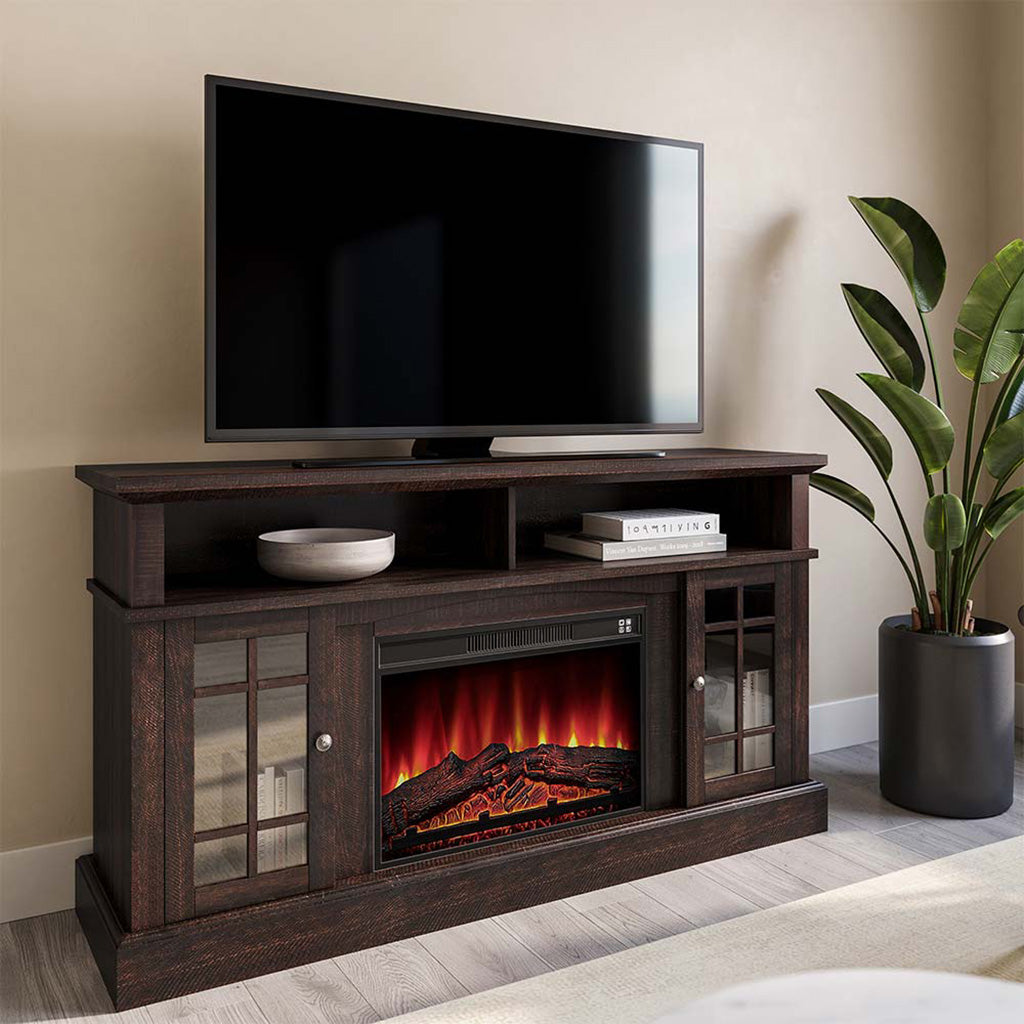
Painting your TV stand is a simple way to refresh your living room without buying new furniture. An old, worn-out stand can look brand new with just a coat of paint.
You can choose colors that match your style and turn a basic piece into something special. It's cheaper than buying new, and you'll feel good about doing it yourself.
This guide covers everything from choosing paint to applying the final coat for professional results.
Materials and Tools Needed
Before starting your TV stand painting project, gather all your supplies. Having everything ready makes the job go smoother and prevents frustrating trips to the store mid-project.
Here's what you'll need:
- Drop cloth or old bedsheet: Spread this under your TV stand work area to protect the floors from paint drips and spills that happen during painting.
- Sandpaper: Get medium-grit sandpaper, around 120 to 150 grit. Lightly sand the entire TV stand surface to roughen it slightly so the paint sticks better.
- Primer: Choose a primer made for your TV stand's material. Wood needs wood primer, metal needs metal primer. Apply this base coat before painting for better adhesion.
- Paint: Pick quality paint that matches your TV stand's material. Decide on your finish too – matte for a flat look or gloss for shine and easy cleaning.
- Paintbrushes: A 2-inch angled brush works for most TV stand surfaces. Get a smaller brush for tight corners, grooves, and detail work on decorative areas.
- Paint roller and tray: These help you cover large flat areas of your TV stand quickly and create a smooth, even finish without brush marks.
- Painter's tape: Use this to cover parts of your TV stand you don't want painted, like handles, hinges, glass inserts, or decorative metal edges.
- Screwdriver: You'll need this to remove TV stand hardware, doors, or shelves before painting for easier access and cleaner results.
- Cleaning supplies: You'll want to have a damp cloth or sponge and a bit of mild soap ready for wiping down the TV stand before you start painting.
- Rust converter (for metal TV stands only): If you spot rust, apply this product first, then use a special metal primer to treat and seal those areas.
- Safety gear: Wear disposable gloves to protect your hands and use a dust mask when sanding to avoid breathing in particles.
Having all these materials ready means you won't have to stop once you start. Good preparation leads to better results, and a TV stand that looks professionally painted.
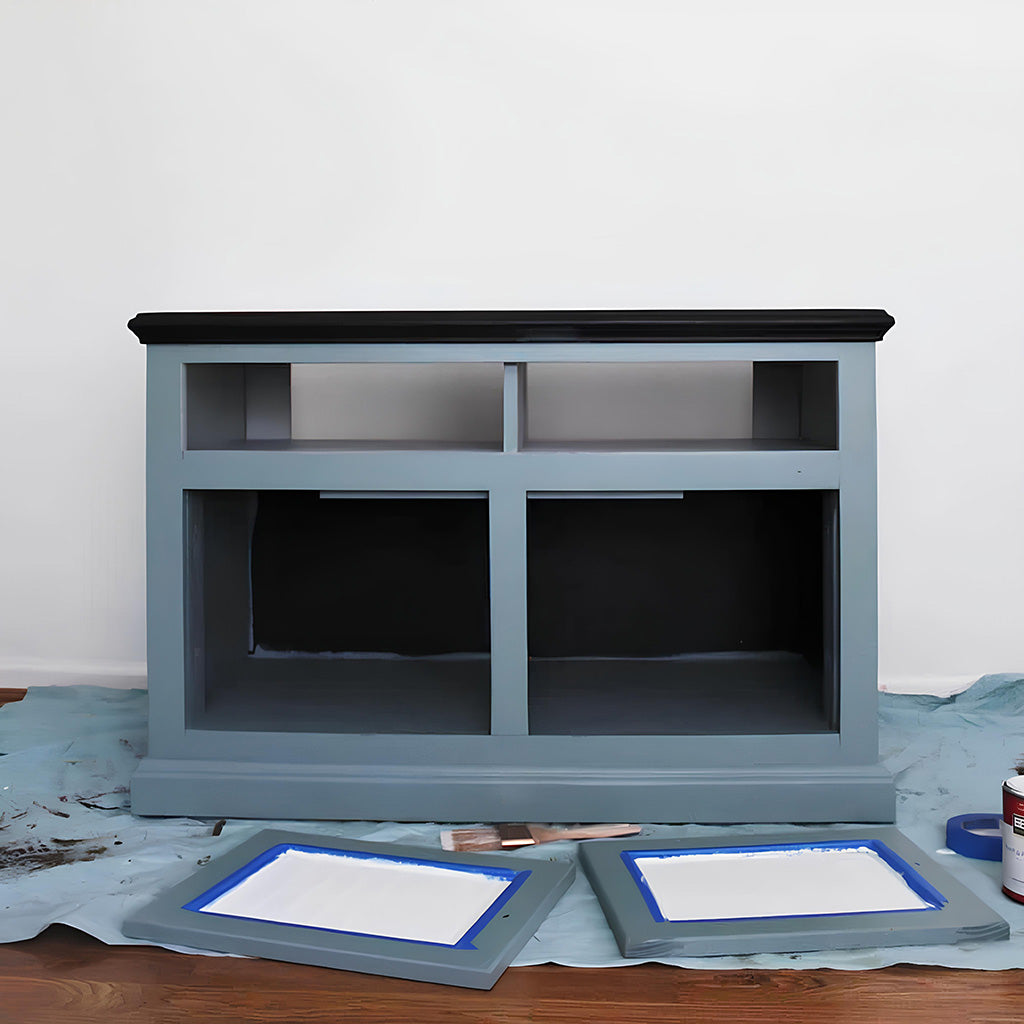
Step 1: Preparation
Good preparation is the key to a great paint job. Taking time to prep your TV stand properly means the paint will stick better and look smoother when you're done.
Follow these steps in order:
- Clear everything off your TV stand. Remove all electronics, cables, decorations, and accessories. This gives you a clean workspace and keeps your items safe from paint.
- Clean the entire TV stand thoroughly. Use a damp cloth with mild soap to wipe down all surfaces. Remove any dirt, dust, or grease that could prevent paint from sticking. Pay attention to corners and crevices where dirt tends to hide. Let everything dry completely before moving on.
- Protect your work area. Lay down a drop cloth or old bedsheet under and around the TV stand. This catches paint drips and keeps your floor clean.
- Remove any hardware you can. Take off drawer pulls, knobs, and handles using a screwdriver. Place all hardware in a bag so you don't lose anything. Label the bag if pieces go in specific spots.
- Apply painter's tape to areas you want to be paint-free. Use tape carefully along edges for clean, straight lines. Cover any hardware you couldn't remove. Press tape edges down firmly to prevent paint from seeping under.
Good preparation takes time but pays off. Your TV stand will have a professional-looking finish that lasts longer because you started with a clean, well-prepped surface.

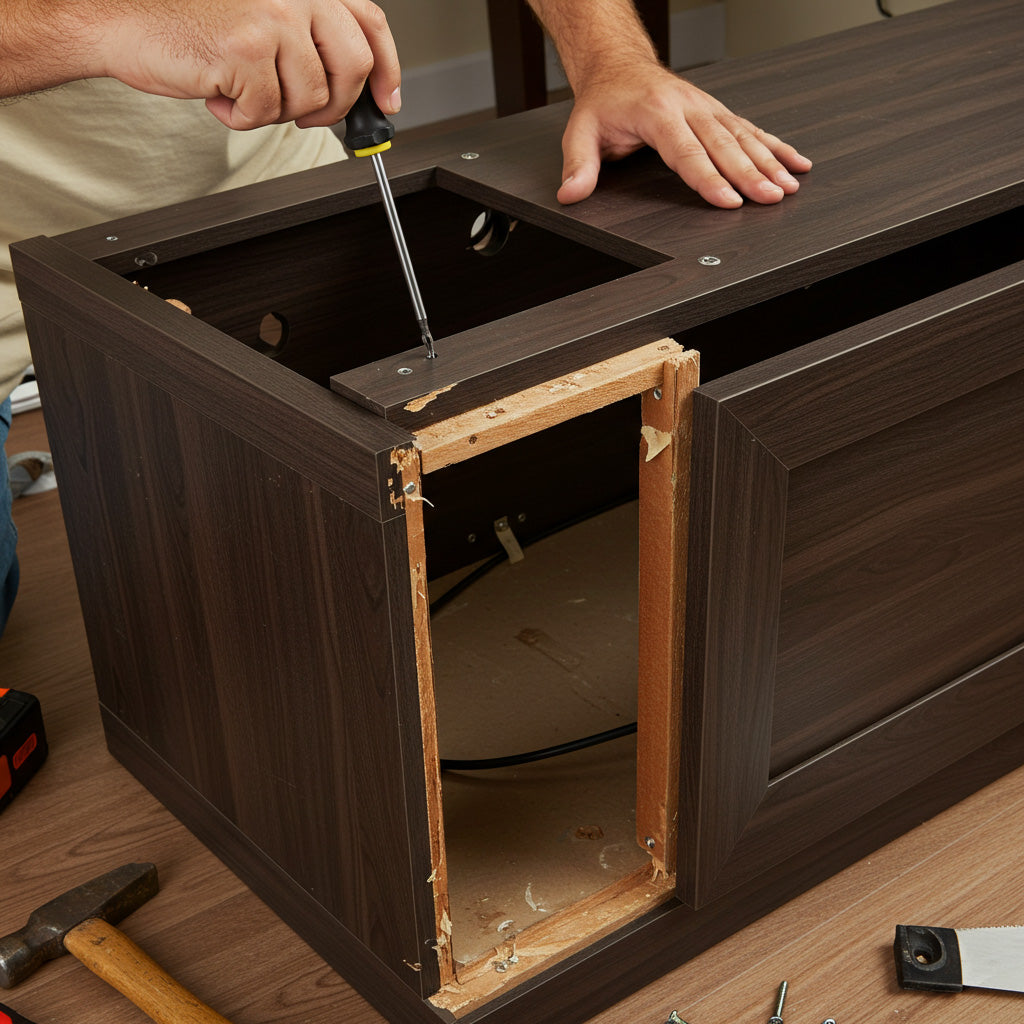
Step 2: Removing Hardware
After preparing your TV stand, you need to remove the hardware. Taking off these pieces helps the paint go on smoothly and evenly across the entire surface.
Follow these steps to remove hardware properly:
- Get the right screwdriver: Check what type of screws hold your hardware in place. Most TV stands use Phillips head or flathead screws. Having the correct screwdriver prevents stripping screws or damaging the wood.
- Identify all removable hardware: Look over your entire TV stand carefully. Find all knobs, handles, drawer pulls, and decorative metal pieces. Don't forget to check the back and sides for any hardware you might miss.
- Remove each piece carefully: Use your screwdriver to unscrew each piece of hardware slowly and steadily. Turn counterclockwise to loosen. Support the hardware with your other hand so it doesn't fall when the screw comes out. Be gentle to avoid damaging the wood around screw holes.
- Keep everything organized: Place each set of hardware in its small bag or container. Label each bag with where it came from, like "top drawer" or "left door." Put matching screws with their hardware. This makes reassembly much easier later.
Removing hardware before painting gives you a clean surface to work with. You won't have to paint around obstacles or worry about getting paint on metal pieces. Your finished TV stand will look neat and professional, like it was painted in a factory.
Step 3: Sanding
After removing all the hardware from your TV stand, it's time to sand the surface. Sanding creates a slightly rough texture that helps paint grip better and gives you a smooth finish.
Follow these steps for proper sanding:
- Choose the right sandpaper: Medium-grit sandpaper (120 to 150 grit) works well for most TV stands. It removes old finishes and roughens the surface just enough. If your stand has a very glossy finish, start with coarser grit (around 100) first. Then switch to finer grit for a smoother result.
- Set up your work area: Place your TV stand on a stable surface over your drop cloth or old bedsheet. This catches dust and makes cleanup easier. Open windows or work outside if possible for better ventilation.
- Sand the entire surface: Start sanding with steady, even pressure. For wood stands, sand in the direction of the wood grain when possible. For other materials, use gentle circular motions. Cover all areas, including corners, edges, and hard-to-reach spots.
- Check your work: Run your hand over the sanded surface to feel for smoothness. The surface should feel evenly rough all over, not glossy or slick. If you find smooth spots or imperfections, sand those areas again until the texture feels consistent.
- Clean off all dust: Use a vacuum with a brush attachment to remove most of the dust. Then wipe down the entire stand with a tack cloth or slightly damp cloth. The surface must be completely dust-free before painting.
Sanding is crucial for a professional-looking paint job. This step creates the perfect surface for paint to stick to, making your finish last longer. Take your time and sand thoroughly for the best results.

Step 4: Priming
After sanding your TV stand, you need to apply primer. Primer is a base coat that helps paint stick better to the surface. It also creates a smooth foundation and covers up small imperfections.
Follow these steps to prime your TV stand:
- Choose the right primer: Match the primer to your TV stand's material. Wood stands need wood primer, metal stands need metal primer, and laminate surfaces need special laminate primer. The label will tell you what surfaces it works on.
- Protect your work area: Make sure your TV stand is still on the drop cloth or old bedsheet from earlier. This protects your floor from any primer that might drip while you're working.
- Mix the primer well: Open the can and give the primer a good stir with a paint stirrer. Primer can separate when it sits on the shelf, so mixing helps it work better and go on more evenly.
- Apply the primer evenly: Use a paintbrush for detailed areas and a small roller for flat surfaces. Start with the big, flat parts of your TV stand. Then work on the edges, corners, and any detailed areas. Make sure you cover everything, especially spots where the old finish shows through.
- Let the primer dry completely: Check the primer can for how long to wait. Different primers need different drying times. Don't try to rush this part – wet primer will ruin your paint job.
- Check for rough spots: After the primer dries, run your hand over the surface. Feel for any bumps, drips, or rough patches. If you find any, gently sand them smooth with fine-grit sandpaper.
- Clean off any dust: If you did any touch-up sanding, wipe away all the dust with a tack cloth or clean rag. You want a perfectly clean surface before you start painting.
Priming is essential for a good paint job. It helps paint sticks properly and prevents the old color from showing through. A well-primed surface means your paint will look better and last longer. This extra step is worth the time for professional results.

Step 5: Painting
Your TV stand is clean, sanded, and primed. Now comes the most rewarding part – painting. This is where you'll see your hard work pay off as your old TV stand transforms into something new.
Here's how to paint your TV stand:
- Choose the right paint: Make sure you have paint that works with your TV stand's material. Wood, metal, and laminate each need different types of paint. Also, decide on your finish – matte looks flat and modern, satin has a slight shine, and gloss is very shiny and easy to clean.
- Protect your work area: Double-check that your TV stand is still on the drop cloth or old bedsheet. Move it if needed to make sure all sides are easy to reach while keeping your floor protected.
- Mix your paint well: Open the paint can and stir it thoroughly with a paint stirrer. Paint separates over time, so good mixing ensures the color stays consistent throughout your project.
- Start with a brush for detail work: Use a quality paintbrush to paint all the corners, edges, and detailed areas first. Apply paint with smooth, steady strokes in one direction. Try not to go back and forth too much, which can leave brush marks.
- Use a roller for flat surfaces: After brushing the edges, switch to a small paint roller for large, flat areas. Roll the paint in slightly overlapping strokes, working on one section at a time. This technique gives you the smoothest finish.
- Apply thin coats: Don't try to cover everything with one thick coat. Instead, apply several thin coats of paint. Thin coats dry faster, look smoother, and won't drip or sag. Let each coat dry completely before adding the next one.
- Fix problems while paint is wet: Watch for drips, streaks, or missed spots as you work. If you see any, smooth them out right away with your brush or roller while the paint is still wet.
Take your time with this step. Good painting can't be rushed. With patience and these techniques, you'll end up with a TV stand that looks like it came from a furniture store. The key is steady hands and thin, even coats.
Step 6: Applying Second Coat (if necessary)
Once your first coat of paint has dried completely, it's time to check if you need another coat. A second coat often makes colors look richer and more even. It's especially helpful if you can still see the old finish showing through.
Follow these steps to decide about and apply a second coat:
- Inspect the painted surface carefully: Look over every part of your TV stand in good lighting. Check for thin spots where the old color shows through. Look at edges and corners where paint coverage might be lighter. Note any areas that look uneven or patchy.
- Decide if you need another coat: If the color looks solid and even everywhere, you might be done. But if you see the old finish peeking through or want a deeper color, you'll need a second coat. Most paint jobs look better with two coats.
- Prepare your paint again: Open the paint can and give it a good stir, just like before. Paint can settle between coats, so mixing ensures consistent color and texture.
- Apply the second coat the same way as the first: Use your brush for corners, edges, and detail work. Then use the roller for flat surfaces. Work in the same order you did before. Keep your strokes smooth and slightly overlapping for even coverage.
- Let the paint dry completely: Check the paint can for drying times and follow them carefully. Don't rush this step. The paint needs time to cure properly before you handle the TV stand or put hardware back on.
A second coat usually makes a big difference in how your TV stand looks. Colors appear more vibrant, and coverage looks more professional. But if you're happy with how the first coat looks, you can stop there. Trust your eyes and go with what looks good to you.

Step 7: Drying and Reassembling
You're almost done with your TV stand transformation. The paint is on, and it probably looks great already. But here's where many people make a mistake – they rush to finish. Taking time now to let everything dry properly will protect all your hard work.
Follow these steps for proper drying and reassembly:
- Check the drying time: Look at the paint can for how long to wait. Different paints need different drying times. Humidity and temperature in your area also affect drying. Let your TV stand sit in a well-ventilated area for the full recommended time.
- Be patient and don't touch: Resist the urge to touch the paint or put anything on the TV stand. Even if it feels dry to a light touch, the paint underneath might still be soft. Moving or using it too soon can leave marks or smudges that ruin your hard work.
- Reattach the hardware: Once the paint is fully dry, get out your labeled bags of hardware. Put each piece back where it came from using the original screws. Tighten screws firmly but don't overdo it. Too much force can strip the screw holes or crack the paint.
- Do a final inspection: Step back and look at your finished TV stand from different angles. Check for any spots you might have missed or areas that need touching up. If you find any, fix them now with a small brush.
Your TV stand is now ready to use. All that careful prep work, priming, and painting has paid off. You've transformed an old piece of furniture into something that looks brand new and fits perfectly in your space.
Conclusion
You did it! Your TV stand looks brand new, and it shows off your personal style perfectly.
The key to your success was taking time with each step. You cleaned and sanded carefully. You primed the surface. You applied thin coats of paint and let everything dry properly.
Now you have a beautiful TV stand and new skills to match. You're ready to paint other furniture pieces around your home. Great job on your first project!
Read More:
What to Do With an Old TV Stand?
How To Make A TV Stand Taller?
Leave a comment
This site is protected by hCaptcha and the hCaptcha Privacy Policy and Terms of Service apply.